
Many technical people always want to re-invent the wheel. “Operating systems are bloated” and all kinds of that stuff. I challenge you to make your own. (with a bit of help from this tutorial, i won’t leave you hanging 🙂 )
Tools
We are going to build a simle boot sector operating system. This is basically a operating system that fits in the first 512 bytes that the bios initializes when executing code on a disk.
To do this we will need 3 tools:
– NASM: A x86 assembler to turn your assembly language into a binary file.
– QEMU – Quick emulator. This can natively deal with your raw binary files and has text output
– Any text editor, i like nano
On a linux debian-y based os, these can be installed with:apt -y install nasm qemu-system-x86 nano
Simple boot sector
jmp $   ; jump to current address - infinite loop

times 510-($-$$) db 0
     ; fill the empty space with zeroes

dw 0xaa55            ; write the magic bytes 55 aa at the end of our file.
This is a simple piece of assembly that will jump infinitely to the current address. This will not do much appart from spinning up your fans, but it will be a great start!
The middle line fills the empty space with zeroes. $ is an alias for the current line and $$ is the alias for the start of your program. So with 510-($-$$) you can pad the program to be exactly 510 bytes (and then 2 for the magic bytes following to make our 512) docs
As you can see, comments are added with the ; symbol. This works just like pyhon’s # or javascript’s //. It is smart to add plenty of comments to your assembly code as it will otherwise become quite hard to read.
We have to fill the last 2 bytes with 0xaa55 to show the BIOS that we have an operating system here. It wouldn’t be good if you started booting from your game storage disk would it?
Running our first program
Save your code to a file called boot.asm and then run
nasm boot.asm -f bin -o boot_sect.bin
to assemble boot.asm into a boot_sect.bin that your pc can understand. And then you can use
qemu-system-x86_64 boot_sect.bin -curses
To boot, -curses will emulate the vga text on your screen.
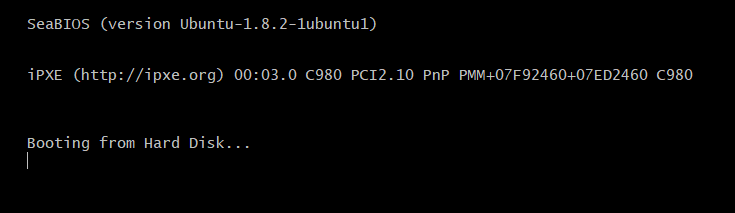
You might not be able to ctrl-c/z out of this. If this is the case you can open a separate shell and kill the qemu process id: kill $(ps -ef | grep curses | awk '{print $2}' | head -n 1)
But thats just a bios boot screen?!
mov ah, 0x0e ; BIOS routine scrolling teletype
mov al, 'H' ; move byte for 'F' into the al register
int 0x10 ; execute the 0x10 "print to screen" interrupt
mov al, 'E'
int 0x10
mov al, 'L'
int 0x10
mov al, 'L'
int 0x10
mov al, 'O'
int 0x10
mov al, '!'
int 0x10
jmp $ ; freeze the screen so we can see our text
times 510-($-$$) db 0
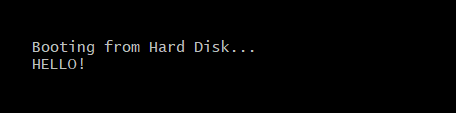
dw 0xaa55 ; magic bytesThe code above will use a BIOS routine to print some text to your screen. Try it yourself and play around a bit with the text.
The code first loads the routine name into the AH register and then the ascii code for the letter in the AL register. Then it calls the 0x10 interrupt which tells the BIOS to use the AH and AL register to print something to the screen. You can find more on registers here. (absolutely worth reading after this article)
—
And then assemble and run:
Logic
Right now we are just manually printing out registers, but it wouldn’t be a computer with some compute. So let’s do a simple calculation
mov ah, 0x0e ; BIOS text typing routine
mov al, '1' ; our text, to make it look better
int 0x10
mov al, ' '
int 0x10
mov al, '+'
int 0x10
mov al, ' '
int 0x10
mov al, '1'
int 0x10
mov al, ' '
int 0x10
mov al, '='
int 0x10
mov al, ' '
int 0x10
; We are upping the ascii code here, not the actual integer
mov cl, 49 ; ascii code for '1', make sure to use another 8 bit register
add cl, 1 ; after '1' comes '2'
mov al, cl ; move to the al register that is used for printing
int 0x10 ; print!
jmp $ ; freeze the screen so we can see our text
times 510-($-$$) db 0
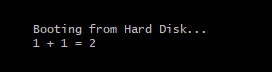
dw 0xaa55 ; magic bytesThe import part here is the block right above the jmp $ instruction.
Old computers use what’s called an “ascii table”, this is basically a mapping between numbers (bytes) and letters.
As you can see, we start by moving the decimal number 49 into the cl (8 bit) register. In The table this corresponds to a ‘1’. Nasm also lets you move the actual character directly but that does the same thing under the hood.
The cool thing with ascii is that they are just numbers, you can increment 1 and get 2. But you can also increment 57 by one and end up with a “:”.
The order of arguments might be a mit misleading to anyone who has never worked with assembly. Generally we use the first argument as the destination, and the second as source. You can see this quite well in the add and mov instructions.
So let’s compile it and try!
Functions and loops
(WIP chapter) It would be a lot easier if we could print strings at once. Here’s a function that does just that!
Do not forget the org symbol, this mentions where the code/data of your program is located so you can use indirect addressing with square brackets.
Caveat: In This way of recursively calling yourself, the stack will not be restored when the null byte is called. How do we fix this?
[org 0x7c00]
mov ah, 0x0e ; BIOS text typing routine
mov bx, str
call printstring
freeze:
jmp $ ; freeze the screen so we can see our text
printstring:
pusha
cmp byte [bx], 0 ; Stop when we see a null byte
je freeze ; pop back variables when we've had all letters
mov al, [bx] ; move contents of bx register to al register
int 0x10 ; print!
add bx, 1 ; move to the next letter
call printstring ; recursively print all letters
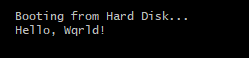
str:
db 'Hello, Wqrld!',0 ; terminate with \0
times 510-($-$$) db 0
dw 0xaa55 ; magic bytes
And onwards…
You did it, you have now made your own very very very basic OS. The rest is up to you 😉
Just joking, you can read more awesome stuff at https://www.cs.bham.ac.uk/~exr/lectures/opsys/10_11/lectures/os-dev.pdf